


Actually, this post should be called Digging it, NOT! But I thought that might be too confusing.
The vegetable seeds I planted back in January have grown into seedlings and are nearly ready to be planted into the ground.
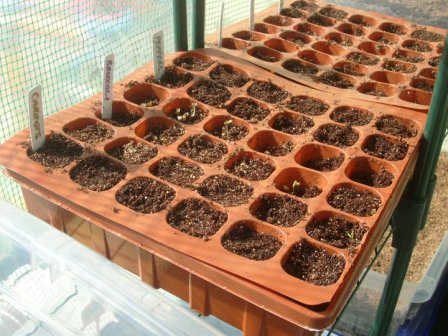
Here are before and after pictures of a tray of seed that got tossled around by the maelstrom in the greenhouse.
They did surprisingly well, considering.
The sprouts on the far left are carrots, then broccoli, a few tomato plants, two or three watermelons and the tall one is a wanna-be beanstalk.
Here are the veggies I planted after the storm incident (L to R beans, carrots, broccoli):
The greenhouse shelving, which you can see a little bit in the background of the picture above, turned out to be a complete waste of money. Even cable-tied together and to the greenhouse, the shelves fell apart again and again. I finally gave up and put everything on the ground permanently to avoid any more mishaps.
Remember my “buckshot gardening” experiment?
Here is a photo of one of the mystery bins of herbs that spilled all over the greenhouse floor. The basil and cilantro did pretty well, can’t really tell what the other stuff is yet. The herbs, I’ve decided, will probably stay in the greenhouse as I can’t even imagine transplanting these into the ground the way they’re scattered. Will make a good kitchen garden.
My Farmer’s Almanac says there’s a 50-50 chance that we’ll be frost-free after March 1, so that’s the approximate time period I’ve set for transplanting the vegetable seedlings outside. I’ll also be growing some lettuce and radishes, but those grow so fast I’ll probably start them next week in peat pots so they’ll be ready for outside sometime in March.
Once I get the greenhouse cleared out a little, I’ll be starting various pepper plants inside. They take a long time and require some TLC.
So I dove into my garden design books to try to figure out the most efficient way to plan out the space.
In between work and my son, I don’t have a whole lot of time, so I went in search of the simplest way to do this garden which would also be organic and make the best use of the resources available — namely water and rich compost material in the soil.
In one of my books I found the strategy I’m going to use. It’s called No-dig Gardening or In-the-bag Gardening.
Basically, instead of tilling up the grass and creating rows, or buying expensive lumber or specially made above-ground gardening apparatus (cost of $60 to $80 per raised bed, not in my budget), you plant the seeds or seedlings in the very bag that the topsoil comes in.
Here’s an example with a tomato plant (picture from the web):
The idea is to lay the bags out in rows in the design you’d eventually like for your garden and the bags will kill the grass and weeds underneath and do the work for you in a few months, creating rows topped with rich, garden soil.
It’s easy to add on a few plants at any time, just add more bags. No digging, no equipment needed.
Other benefits are that you use less water because the moisture is sealed in the bags. A few small slits in the bottom of the bag will prevent drowning the roots of the plants.
And all the weeds in the bags of soil have been theoretically killed, so gardening this way should minimize the back-breaking task of weeding. Not everyone has a toddler whose favorite chore is to pull weeds!
Another method of doing this is cutting only slits in the bag, shaped like a cross or a T and planting the plants in the slits, with the bag acting as a built-in plastic sheeting mulch. The trick there is to make sure that water gets into the bag and doesn’t just roll off and the down side is that the plants don’t get the full benefit of a nice rain.
Here is a rendering of what this No-dig gardening looks like used in a planned garden:
If you don’t like the appearance of the bags, you can cover them with mulch or hay as pictured in the foreground of this rendering.
Trellises for vines are installed right above the bag.
So I’ll be trying this No-dig gardening with large bags of organic topsoil and will report back on how it works out.
If anyone has tried this method, please let me know how it worked for you and if there are any pitfalls I could avoid.
I’ve gotten a couple of questions from readers about the bunny.
She’s fine, she is an outdoor bunny now (more about that in another post), and she’s happily producing lots of fertilizer.