As a parent, you’d like your home, community, and children’s schools to be greener. Unfortunately, daily life can get in the way of that. You have limited time and budget in which to make the world around you a more sustainable place.
But fortunately, going green doesn’t have to be difficult, time-consuming or expensive. In fact, a smart and savvy parent can go green and save green at the same time. Here are a few easy ways you can change the world for the better, and even have fun while you’re at it:
* Click it – Most children (and a lot of adults) have no idea where the power comes from. So leaving lots of lights on in the house is no big deal. Teaching kids the value (monetary and environmental) of turning out the lights they’re not using is a direct way to connect being greener with something your kids do every day. You could even have competitions with your kids to see who can turn out the lights the fastest.
* Slay vampires – Just because something’s off doesn’t mean it’s not still using electricity. While some newer appliances and gadgets are getting much better at using minimal electricity while on standby (or “off”), many continue to be “energy vampires.” Cell phone chargers are infamous for using nearly the same, if not equal to, the electricity that’s used when charging a phone. Here again you can make a game out of “slaying the vampires” with your kids. They have fun and you save money.
* Strip – Does the thought of unplugging and replugging cords for so many things make you think you’ll never stick to it? Easy — get a power strip for each cluster of things you have in the house (i.e., family room, kitchen, kids’ play room) and plug everything into those, rather than each in its own plug. Then, you can easily turn several things off (and back on) at once. Even the most affordable power strips have the ability to have some dedicated plugs for those “need to be plugged in” things like the refrigerator.
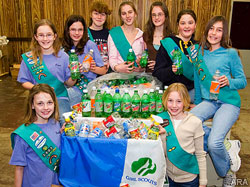
* Get trashy – As a parent you probably go through lots of food for your kids that comes in difficult- or impossible-to-recycle packaging, as far as you know. There’s a company called TerraCycle that makes products like umbrellas to backpacks, gardening products to recycling bins from recycled trash. TerraCycle works directly with the public, enlisting their help in the form of “brigades,” – self-organized groups of people, typically schools – that collect packaging. The newest collected product is Malt-O-Meal, the cereal company that long ago decided to “Bag the Box,” skipping the paper box that is typical of cereals; that alone already reducing the packaging by 75 percent.
Kristen Burke, a third grade teacher at Signal Hill Elementary School in Manassas, Va., leads one of these brigades. “The more my class and I began collecting, we truly began to look at trash in a different light,” she says. “It was no longer trash to us, instead, it was things that could be turned into new products, as well as money to help our school. While raising money for our school was a wonderful incentive, it has become even more so during the times of budget cuts within our school. We have found a way to help our school and save the environment.”
But in the end, the smartest resource you may have for going greener may be right under your nose – your kids. Children are increasingly green savvy, and they probably have a lot of great, creative ideas that you’d never think of. They get to be helpful, you learn some new things to do, and everybody – including the planet – wins.
If you want to get started immediately in greening your home, try upcycling some of your own trash to make a wallet.
Food Wrapper Wallet
Materials:
1 clean, empty food package (at least 7 inches by 5 1/2 inches in size)
1 ruler
1 pen
1 pair of scissors
tape
1 self-adhesive Velcro fastener
Directions:
1. Cut a rectangle that is 7 inches by 5 1/2 inches in the package. Centered inside the rectangle, draw a smaller rectangle that is 4 inches by 2 1/2 inches. This smaller rectangle will be 1 1/2 inches from each edge.
2. From the top edge of the smaller rectangle, draw a semicircle that intersects with the top of the large rectangle and the corners of the small rectangle. Repeat for the other three sides. Cut around these lines.
3. Fold in all four semicircles so your cut piece folds up to the size of the small rectangle. Tape the bottom flap and two side flaps in place.
4. Attach one side of the Velcro fastener on the inside of the top flap. Fold down the flap so the other side of the Velcro attaches to the outside of the bottom flap.
If you’d like to join or start your own TerraCycle Brigade, go to www.terracycle.net.
Courtesy of ARAcontent


